The eco-pots project arises with the idea of designing green roofs on the roofs of any city, transforming arid sterile roofs into green areas that contribute to better oxygenation of the city.
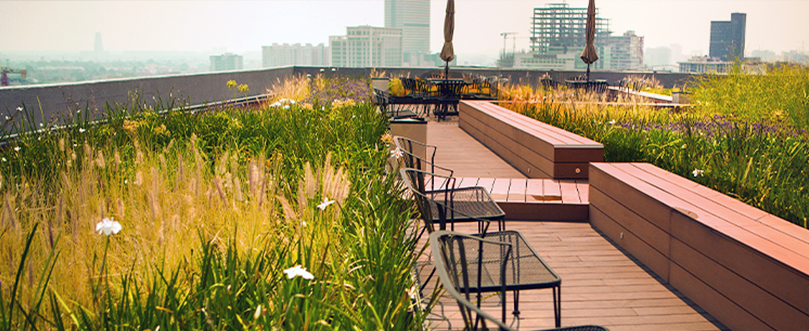
A green roof is a roof that has at least 40% of its surface covered with vegetation. There are several technical solutions that make it possible to create green areas on a roof safely, that is, without affecting the proper functionality of a roof. The most practical solution to create a green roof is with our Verde Modular™ floor eco-pots.
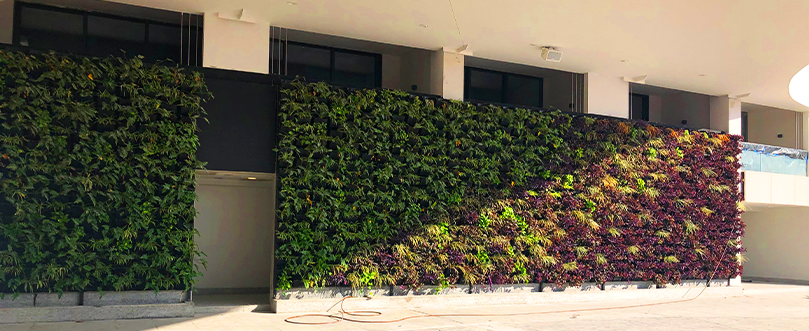
The intervention of walls with vegetation responding to specific designs is something that began to become popular in Paris, and this responded to being able to cover the Building Face or House external walls with vegetation, which requires an irrigation mechanism and a system that offers the possibility of housing plants on the exterior or interior walls. Currently the most efficient technical solution on the market is our Verde Modular™ wall eco-pots.
Our eco-pots stand out from existing products in the market by being a product that has water storage separately from the substrate and allows constant reabsorption of water, thus promoting the proper development of plants. The eco-pots are designed to be installed quickly, easily, and safely.
All our products are made with 100% recycled plastic and are 100% recyclable, and proudly designed and manufactured in Mexico. They are lightweight, stackable, and easy to handle, factors that have made our eco-pots preferred for large-scale architectural designs and domestic use.
The design of the eco-pots is so practical that they adapt to any internal or external space, allowing your plants to thrive.
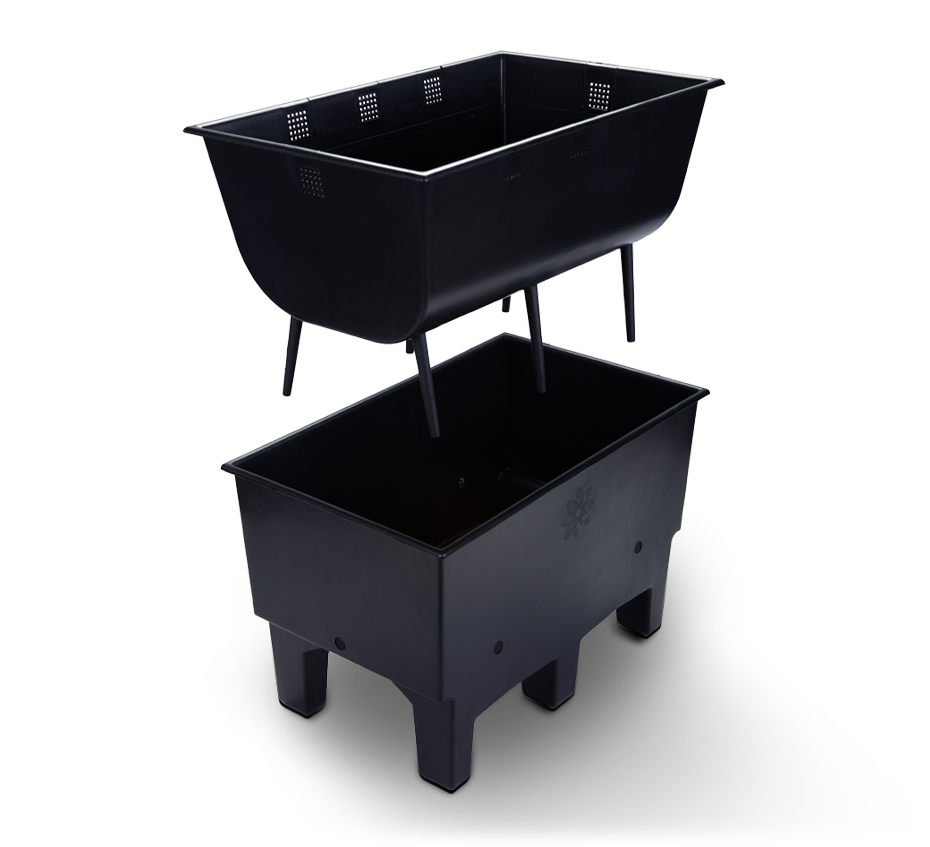
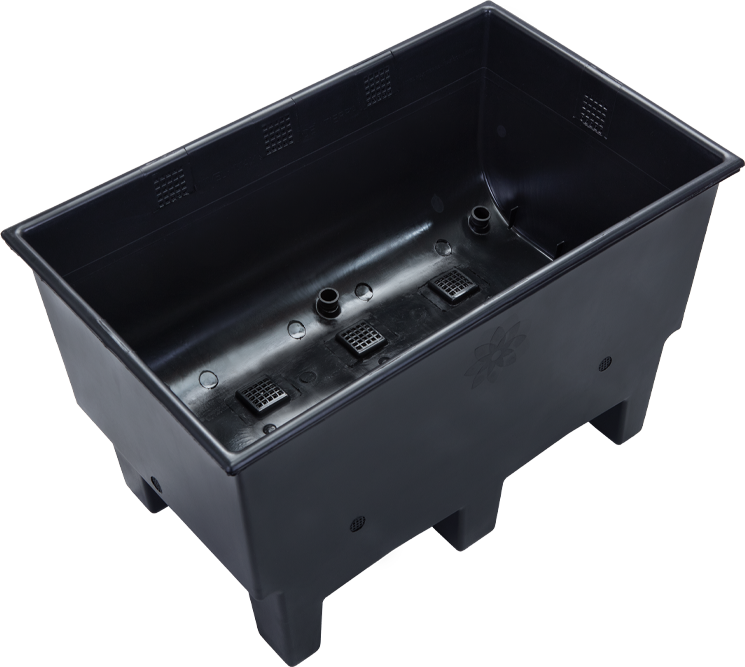
The floor eco-pot has an innovative design that allows it to adapt to the surface where it is placed, it stores up to 1.3 gallons of water in each eco-pot (9.51 gallons / 10.75 square foot), thus becoming the green roof system with the largest storage capacity of water (rain) and self-irrigation in the world. The design of its "legs" allows air and water to flow under the eco-pots, thus avoiding the possible generation of humidity and without compromising the proper function of the building’s roof drainage systems thanks to the anti-corrosion drain system. Special Rainstorm design that prevents the overflow of the substrate.
It is ideal for interiors as it does not drip off the floors and thanks to its design and dimensions it can be used for a wide variety of plants and vegetables.
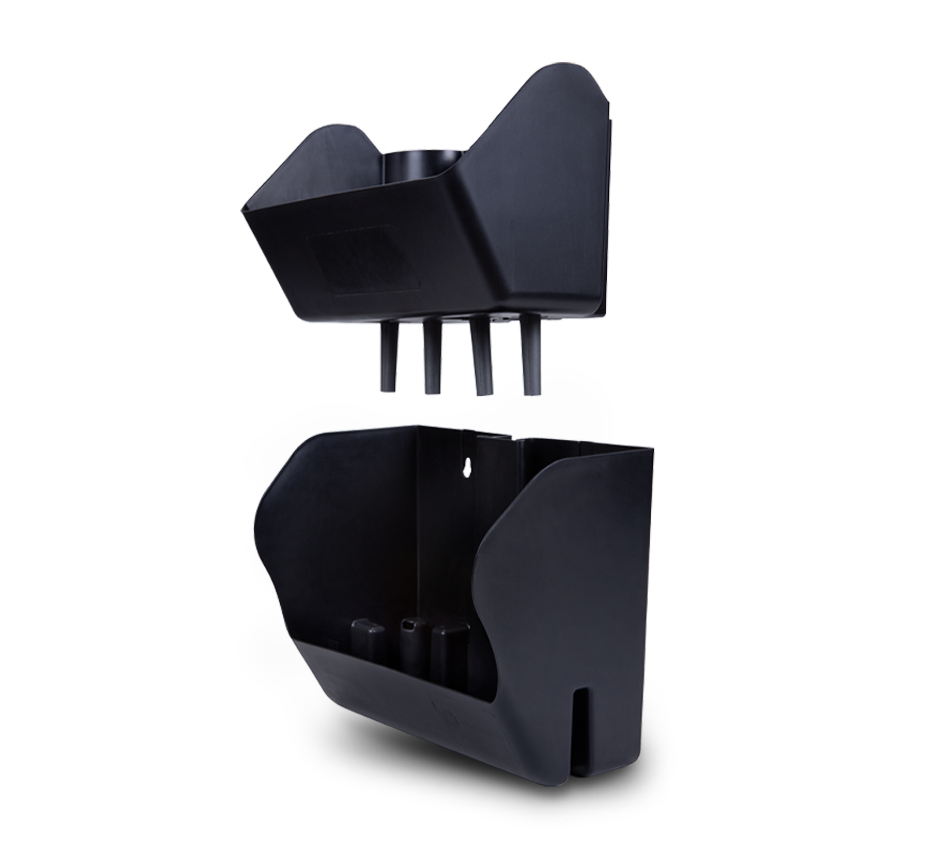
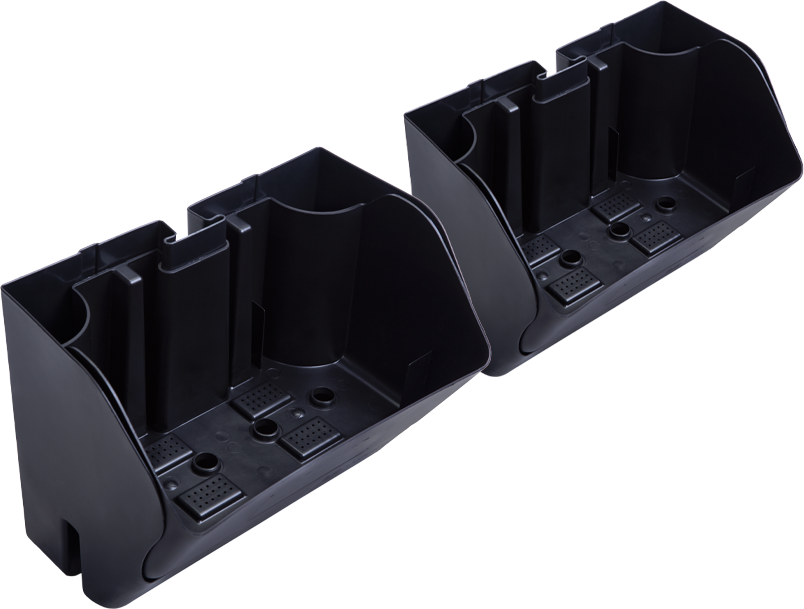
The wall eco-pot has a unique design in the market that allows the use of mature plants thanks to its large substrate capacity in each module, creating leafy walls from the beginning of its set up and placement. Each eco-pot has its own water tank and a “cascade” irrigation mechanism, thus reducing the maintenance and irrigation of the plants, optimizing the consumption of water and energy. Each square meter of green wall can store approximately 2.86 gallons of water, making it the system with the largest water storage and self-irrigation capacity in the world.
The modular design of the wall eco-pots allows the installation to be adapted to the characteristics of the wall where they will be placed (height and width).
1. The eco-pot is made up of three pieces: inner container, pipettes (6 pieces) and outer container.
2. Fill the pipettes with the substrate by hand (you can use a pencil or another pipette to fill the pipettes).
5. Spread and fill the eco-pot with substrate, inside the inner container there is a line (marked) that delimits the maximum level of substrate.
6. Plant by opening small holes by hand or with the help of a garden spade to plant each of the chosen species.
3. Insert the 6 pipettes (already with substrate) into each of the holes inside the inner container.
4. Insert the inner container to the outer container.
7. Water with plenty of water (no more than 1.31 gallons).
8. Locate in the ideal part of our house, office, terrace, or roof garden.
1. The eco-pot is made up of three pieces: inner container, pipettes (4 pieces) and outer container.
2. Fill the pipettes with the substrate by hand (you can use a pencil or another pipette to fill the pipettes).
3. Insert the 4 pipettes (already with substrate) into each of the holes inside the inner container.
4. Insert the inner container to the outer container.
5. Spread and fill the eco-pot with substrate, leaving at least one finger width free of substrate from the outer edge.
6. Plant by opening small holes by hand or with the help of a garden spade to plant each of the chosen species.
7. Water with plenty of water (no more than 0.24 gallons)
8. Locate in the ideal part of our home, office, terrace, or roof garden.
9. The eco-pot can be assembled in two ways:
a) Independently: directly to the wall since it has two Screw holes, it is fixed with two screws and plugs by placing washers in the outer container.
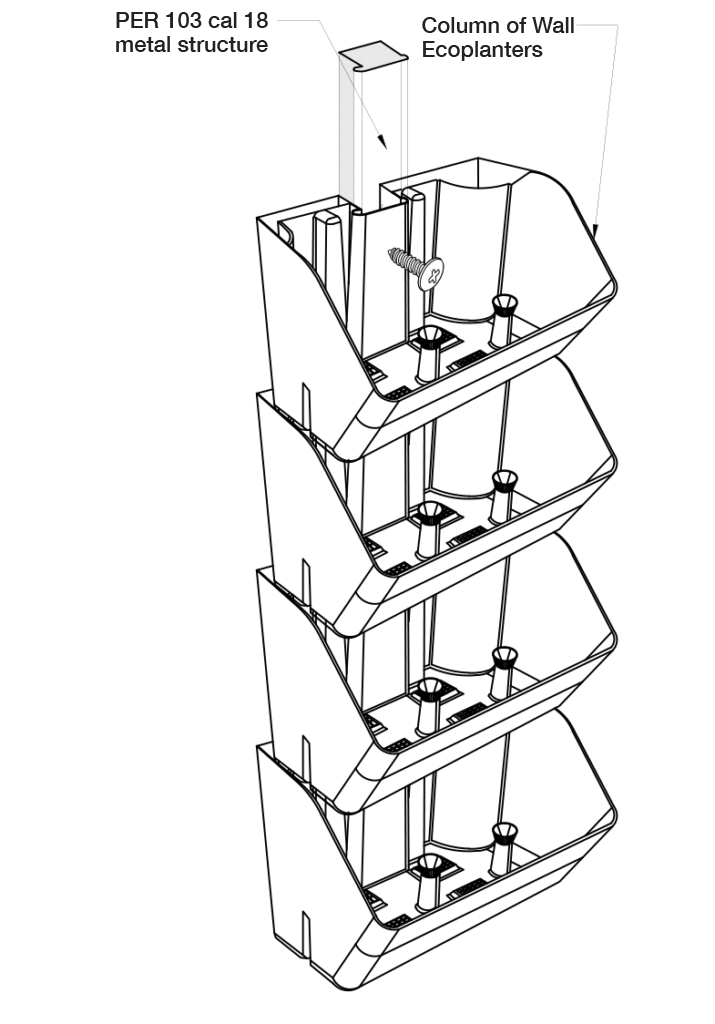
b) In a rack structure (one on top of the other): the best way is to hire a specialist technician. The installation requires a metal Profile 103 model metal frame (you can find it in any hardware store, a screw must be placed in the first pot and then every 3 eco-pots (count from the first to the fourth wall eco-pot). A drill, screw and washer are required for each one. There is no height specification can be the size as required.
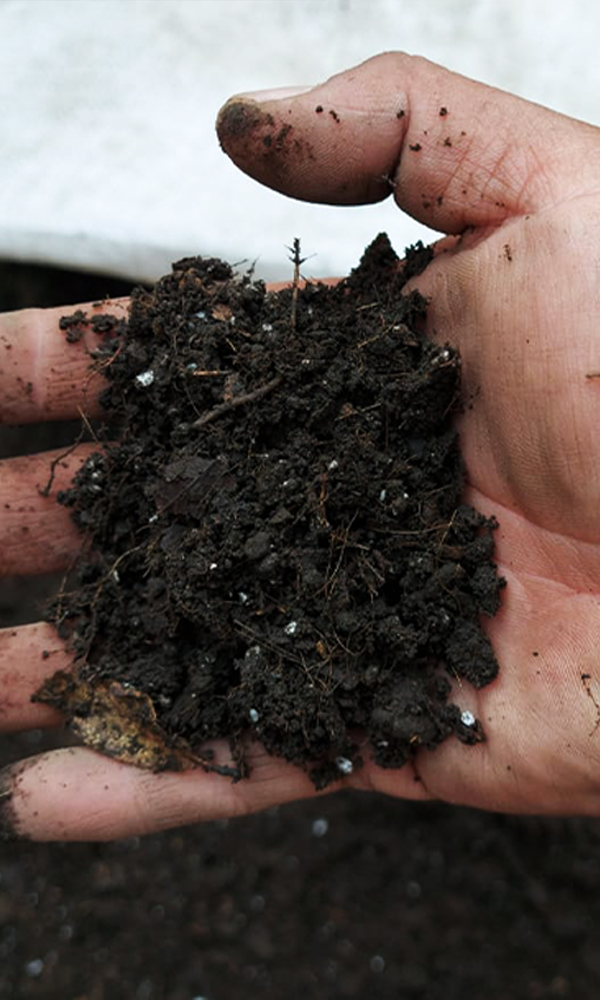
“Substrate” is the medium (mulch dirt) in which the plants grow in our eco-pots is a mixture of several elements.
Our substrate is very important for the proper functioning of the eco-pots, each eco-pot contains a tank where it stores water.
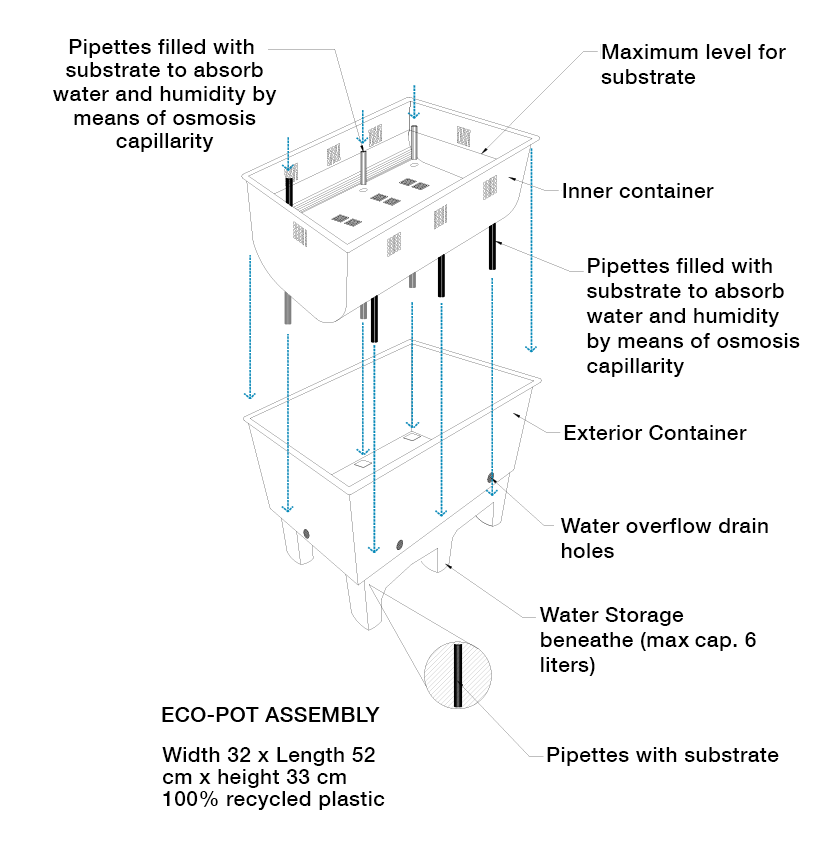
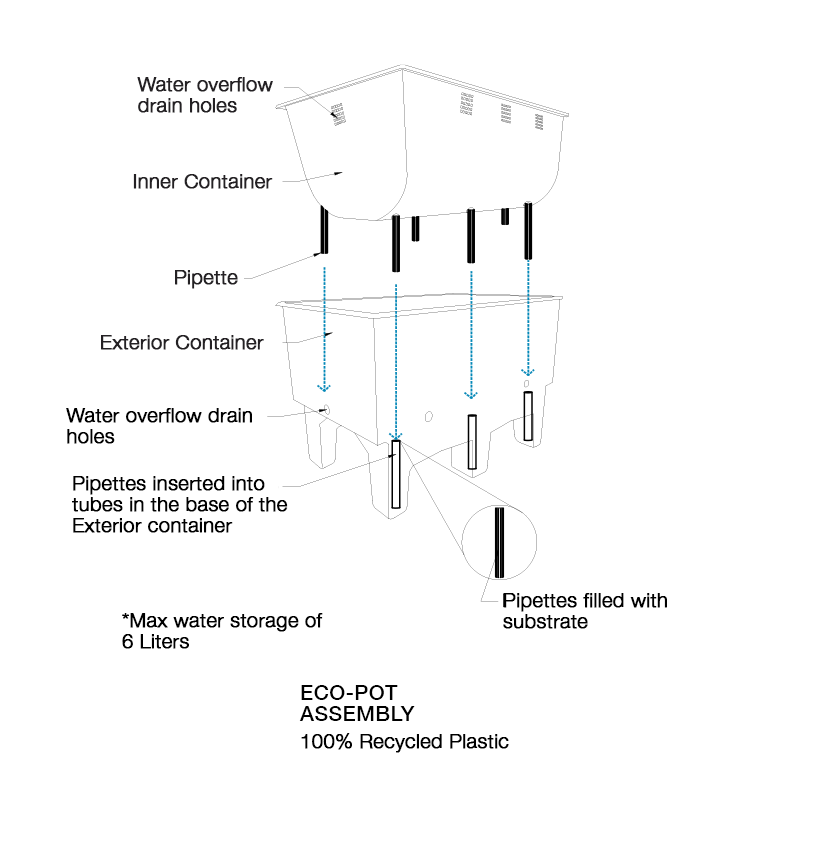
The water will be able to pass from the tank below to the upper container through the pipettes using coconut fibers contained in the substrate to transport the water via osmosis (capillary fibers). Therefore, it is very important that the substrate used in the eco-pots (and in the pipettes) contains at least 25% coconut fiber (ground) in its composition.
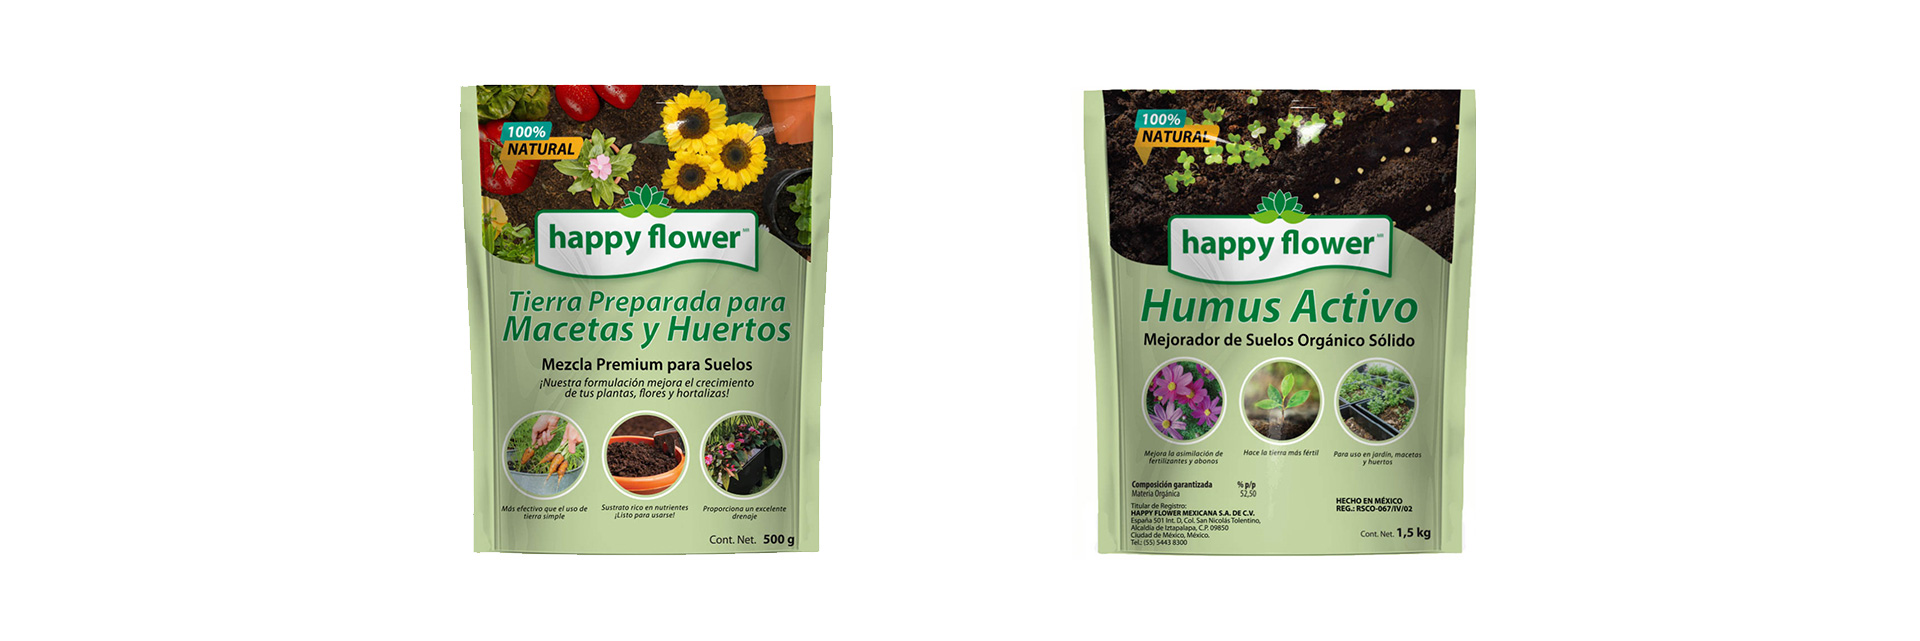
You can buy the SUBSTRATE with your eco-pot Supplier since it is included in every eco-pot price.
The floor eco-pot can store up to 1.32 gallons of water, so watering must be weekly, always taking care not to exceed the maximum capacity to avoid dripping. In case an automated irrigation system is required, we recommend the advice of a specialized technician.
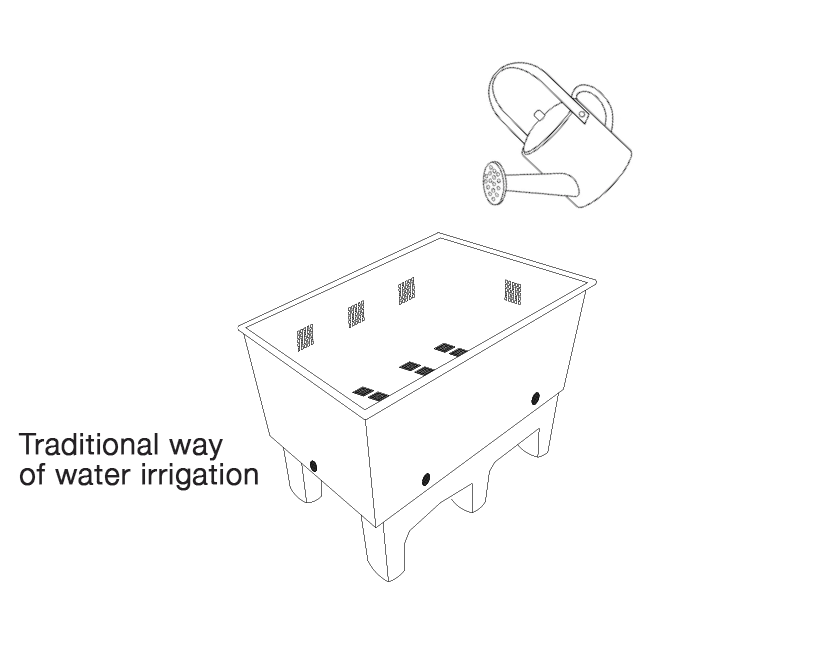
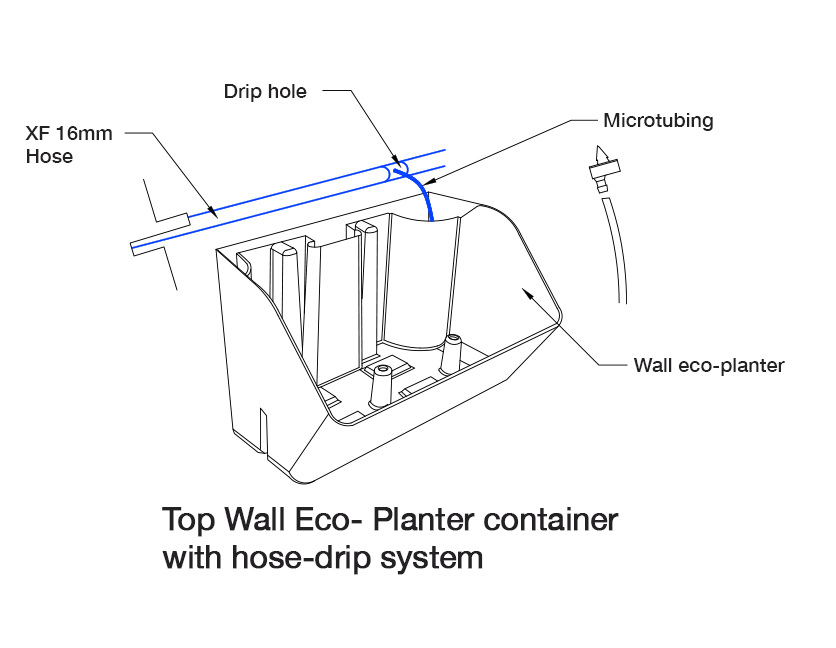
The wall eco-pots have a water tank which, when filled, will drain the water directly into the tank of the lower pot (waterfall effect). The irrigation system that feeds each column of eco-pots should only be connected to any of the upper holes in the eco-pot that is at the top of the vertical garden. We recommend the advice of a specialized technician.
The following diagram specifies the form of irrigation in which the system is connected through a dripper and microtubing with the supply hose:

Thank you for contacting us, we will get back to you as soon as possible.
Thank you for your message, we will contact you as soon as possible to start the registration process as a Verde ModularTM store.